Showing posts with label By Fire and Sword. Show all posts

Sunday, 27 September 2020

By Fire and Sword Battle Report - Muscovy vs Ottoman Empire.

 Hi again,


Apologies for the lack of posts on the blog lately, it's been a busy time. Indeed, this game was actually played over a week ago so the details are fairly hazy. That said, it was actually one of the better games of By Fire and Sword that I've played. I used the new Prince Boriatinski's Pomiestna Cavalry Regiment skirmish list while Nathan used the European Skirmish Force - our first time with both lists. I think Boriatinski's regiment is interesting, allowing more elite and Dvorian troops than the regular Muscovite skirmish list. Losing poor tactical discipline is also worth the extra cost of the list in my opinion. I was two FSP above Nathan's list (9 to 7, from memory) and suffered a cowardly commander (two command points for my commander to order a charge, amongst other things) and I believe fatigue (three markers placed by commander that once removed due to failed morale tests, results in -1 morale across the board). My reconnaissance advantage got me a decisive moment that I never ended up using!

Deployment. Russian troops focus on their right while the Ottomans stick to the centre.

The Russian right. Elite Dvorians, Skirmish Boyars and regular boyars here.

In the early turns the Muscovites make it to the central objective first. The lone boyar squadron on the left punched above its weight, breaking a unit of Sipahi. With the lance sipahi in the Ottoman Empire centre at risk of total encirclement should the gonullu on their left falter, we thought we were in for a quick game!

The Muscovite encirclement was looking good...

...however around turn 4 the Ottoman's get their act together. The formerly broken Sipahi had rallied and managed to drive off the dangerously exposed boyars of the Muscovite left. The lance sipahi weren't even needed and the gonullu held, saved by the inability of the Muscovites to muster enough troops to charge.

Here's where it turned. Over turn five and six the lance sipahi, unengaged up to that point, turned 180 degrees in turn five and charged in turn 6 along with the gonullu. The muscovite centre shattered.

Turn 6 was decisive. The Muscovites had held onto the approaches but the lances of the sipahi and taken back the central hill and the Ottoman's won by 2 points. Victory snatched at the last moment! By chance or by design, Nathan keeping his lances until the last moment proved decisive. I simply had no unit that could fight those guys toe to toe, and my command difficulties due to my cowardly commander meant I couldn't get enough squadrons to mass attack them. A great game that really demonstrated that you lose nothing by playing By Fire and Sword at the smaller skirmish level.

Tuesday, 7 April 2020

By Fire and Sword - Muscovite Army

Hi again!

Finally, after about 4 months since starting, I've finally finished my Muscovite army for By Fire and Sword. This has been my major project since the end of last year so it's a huge relief to finally finish it.

Kind of. As with all things wargaming, a project is never really finished. In the future I want to add small Soldat and Field Dragoon regiments along with a hefty artillery contingent. I also intend on buying two of the Cossack Skirmish Set boxes to field them as either a large standalone skirmish force or as an allied regiment for the Muscovites. But, these are future plans and I have some smaller projects upcoming before I start buying more BFaS.

Upcoming on the blog expect to see Firestorm Planetfall and some 10mm ancients. I've grabbed some Gauls from Pendraken which I can't wait to paint and I'm really excited that I managed to get my hand on the two player starter for the long out of print Planetfall. Onto the pictures!

Editors Note: Pictures had to be re-uploaded as somehow they broke. How annoying!
Glory to Russia

The army from another angle

The first border dragoon regiment

The second border dragoon regiment

The streltsy. Not many photos of these guys around for whatever reason
I love the Streltsy models - full of character!

Pomiestna cavalry regiment.
Dvorians - perhaps my favourite models in the army
Boyar sons with spears

My general.

Zavoivodchicy

Bonus pic! My Holy Roman Empire army occupies the left tray. Plenty of room to expand the Muscovites then...


Thanks again for looking, I hope this post can serve as an inspiration for finishing your own army. I also know there's not a lot of pictures of painted Muscovite armies on the internet and in particular very few photos of Streltsy so hopefully it's also a good resource for those considering starting the Muscovites.

Bye / До свидания!

Thursday, 19 March 2020

By Fire and Sword Battle Report - Muscovy vs Ottoman Empire, Task Force.

Welcome again!

Today is the blog's first battle report! This was a task force level game of By Fire and Sword on the  Capture the Crossing scenario. This scenario is slightly different to the skirmish scenario in that it features a farm on each side of the table as capture points in addition to the main crossing. The stream is fordable along the entire length for half movement. My opponent Nathan and I both took nearly full task forces which are listed below. Please note I made a massive error when deploying and put down 8 bases in the border dragoon pike squadron instead of four (I'd been eyeing off division construction during the day...). This definitely had a significant effect on the game as the pike block was involved in two combats that were drew only due to their outnumbering their opponents... Sorry Nathan!

Muscovy - Border Defence Task Force - 22FSP
Voivode (2 command points)
Vanguard
6 Field Dragoons (musketeers)
Base
8 Border Dragoon Musketeers
4 Border Dragoon Pikes (ooops...)
6 Elite Dvorians
8 Boyar Sons
Captain (1 command point)
Falconet 1.5pdr
Transport Wagon (not present on the table by mutual agreement)
Level 1
8 Town Streltsy
Level 2
8 Boyar Sons w/spears
Falconet 1.5pdr
Level 3
8 Border Dragoon Musketeers
Golova (2 command points)
4 Skirmish Boyar Sons
Quarta Colubrine 5f
Level 4
6 Reiters

Ottoman Empire - Task Force from the European Provinces - 20FSP
Beylerbey (3 Command Points)
Vanguard
5 Besli (proxied with Tatar Warriors)
Base
6 Sipahi w/Lances
6 Sipahi
6 Gonullu
Aga (1 command point)
Transport Wagon (not present on table by mutual agreement)
Darbzen 300 Dirhem
Level 1
6 Janissaries
Level 2
4 Besli (proxied with Tatar Warriors)
Sanjakbey (2 command points)
Darbzen 1 Oka
Level 3
4 Tufecki
Darbzen 2 Oka
The table setup. The farms near the river are objectives alongside the bridge.

Deployment after Turn 0. Turn 0 was quite eventful as the besli charged accross the stream into the field dragoons who were on defence orders. I expected the dragoons to shoot them off but alas the besli made it in and drew combat, nullifying my recon advantage.

Border Dragoons en masse. Including my cheating pike block... still feel bad about that.

In all our games Nathan makes extensive use of march columns early in the game to move up his units. Not many units left to base for him!

The centre of the Muscovite line. Town Streltsy in the wood and the field dragoons up front from their recon. I had run out of room to get the spear boyars in a good position.

The Muscovite right. The elite sotnia in the woods, reiters centre, skirmish sotnia (in disgusting grey) on the right backed up by the boyars.

The Ottoman right. Tufecki are off screen further right. Nathan made a decision to not really contest the bridge and instead focus on the farms.

The post Turn 0 situation in the centre. These two units would proceed to duel for FIVE turns without either fleeing. The besli would spend most of the game disorganised and were totally annihilated in the end.

Turn 1 saw Ottoman artillery disorganise the streltsy, who promptly withdrew into the boyars. Thankfully the boyars didn't disorganise as well.

The Muscovites advance on the right. I made the decision to attack two units at a time and relocate two units to a more central position. I only had five command for the entire force so I had to be careful.

The left advances to the farm. The right hand musket block would move onto defence orders in turn two as the border dragoons went onto defence turn by turn. This commander only had one command point so going to defence early was key.

The Ottoman right advances. Sorry for the blurry photo.

Tufecki anchored the Ottoman left.

Glorious cavalry line. За родину!

Reiters (proxied from my HRE army) engage Ottoman besli. They won without issue.

The second wave continues their move to the centre.

Ottoman Sipahi shake out into attack formations.

The initial Muscovite attacks were successful on the right but this would soon change. The besli are fleeing while the Tufecki are disorganised.

The situation at the end of turn 3. The skirmish sotnia are out of command range and the reiters are dangerously exposed to case shot. Meanwhile the elite sotnia has shaken out into line.

Somehow the border dragoons kept holding on... Not seen is a falconet on the far left which used case shot again and again to help repel the Sipahi and Janissaries. Oh and something something cheating pikes...


Case shot and bow fire from the gonullu (that damn shooting left...) routs the reiters. From success to disaster on the right.

Allah Allah! The Sipahi try once more but to no avail, their morale failing them after more case shot. The block in the background had suffered casualties from musketry before being fought off by the boyar sons.

At the end of the game my wonderful, freshly painted streltsy had done... uh, nothing. Secured the bridge, I guess.
We ended up calling the game at the end of turn 5, with the Ottomans having too many units in disarray and the Muscovites firmly in control of two objectives. This was a really fun game (marred by my realisation this morning of the too large pike unit...). This is the biggest game either of us have played so far. Task Force is a fun level, it doesn't take much longer than skirmish games but is visually much more spectacular. Turn 0 is a fun concept as well. I think if we could play this again I would use the vanguard to occupy the farm on my side of the river so they can be left on defence orders without a worry and use the streltsy and artillery to support them. This would leave the border dragoons to hold the centre, but with much more command from the general could do it. The right I think was managed fairly well but suffered from Ottoman case shot in the end. If I were Nathan I would have garrisoned his farm with infantry early in the game and used it to anchor his flank while pushing for the crossing or my farm with the strong force of Sipahi.

In the end, a Muscovite tactical victory. Bring on division level!

Tuesday, 17 March 2020

Hobby Update - By Fire and Sword, Dystopian Wars


Hi there!

I'm back today with a short hobby update. I've been churning out a significant portion of the remaining infantry of my Muscovite force for By Fire and Sword. This involved finishing the last of my border dragoons and starting my Streltsy regiment. I also pulled some Dystopian Wars miniatures out of the cupboard and put some paint to them. I hadn't put paint down on anything in a couple of weeks so these got me back into the rhythm before I hit the main project again. Next up is the cruisers and small flyer tokens from the Dystopian Wars set. I hope you enjoy!

The infantry contigent. 12 border dragoon and 8 streltsy bases.

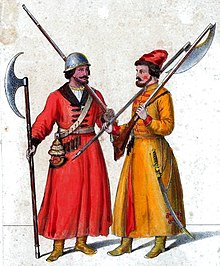
The streltsy uniforms were based on the image below. This was a win as it allowed me to continue using my orange "theme colour".
Image result for streltsy uniform
The Moscow Streltsy had red uniforms and I presume the left figure represents them. Mine are more generic.
All the border dragoons are completed. These two regiments form the infantry core of my division along with the streltsy.

Kingdom of Britannia figures for Dystopian Wars. Had a heap of fun with these and there's more in the cupboard!

Friday, 21 February 2020

By Fire and Sword - Faction Overview Part 2


Welcome back! Today is the second part of my faction overview for By Fire and Sword. Today’s post is going to focus on the factions not included in Republic in Flames / the original rulebook. I’ve included what supplement each faction is from in the faction heading. Once again I’d like to remind you that all skirmish lists and some task forces are included in the online army builder at ac.fireandsword.wargamer.pl should you wish to play around with lists and check out unit rules and stats.

Holy Roman Empire – Rules found in The Deluge
Image result for by fire and sword holy roman empire
Pike and shot infantry are a staple in the western armies
Pros
-          High quality, dependable cuirassier cavalry
-          Pike and shot formation infantry
-          Good quality and plentiful artillery
-          High command
Cons
-          Units are often expensive – expect to be outnumbered by the eastern factions
-          This is Not Our War means your units may start the battle understrength
-          Imperial armies suffer a reconnaissance disadvantage

If the pros and cons list didn’t give it away, the Holy Roman Empire (HRE for short) are similar a faction to the Kingdom of Sweden. In fact, most of the western factions share a similar roster and play style. Imperial cuirassiers are basically identical to reiters rules wise and play much the same way. The Imperials have access to strong cuirassier formations including the Piccilomini Regiment, a rock hard regiment of morale 6(!), armoured veteran reiters which is up there as one of the most elite regiments in the game. Pike and shot battalions backed up by artillery provide a defensive core to Imperial armies that can be used to anchor a flank or hold the centre of the battle line. Croat cavalry provide an interesting light cavalry option not available to the Swedes that may open additional options for Imperial players.

Imperial players can expect to use their defensive infantry to hold an objective or key position while their cavalry and dragoons takes the offensive and work the flanks of the enemy. High quality troops in combination with high command points allow an Imperial player to manage their units with a high degree of confidence in the face of larger enemy forces. Imperial players will need to leverage their command advantage against the enemy, in particular when up against the huge armies of Muscovy and the Ottoman Empire.

Brandenburg-Prussia – Rules found in The Deluge
Pros
-          A mix of lower quality and higher quality western troops provide a potentially larger force than most western style armies
-          Prussian armies have access to plentiful Spanish muskets
-          The demi-regiment system provides flexibility in division construction
Cons
-          Those same lower quality troops may become a liability if you are used to their better counterparts
-          Prussian forces are unable to use offensive tactics
-          Brandenburg forces still suffer from low numbers compared to eastern armies

Brandenburg-Prussia is an interesting faction that utilises a similar roster to the Swedes and Imperials. What makes the faction interesting is the combination of high quality Brandenburg units with lower quality Prussian units. The Prussians suffer from the  Poor Tactical Discipline and Militia but are cheaper than their Brandenburger brethren. This enables the faction to boost their numbers with cheaper Prussian troops in centre divisions while maintaining a core of skilled infantry or reiters to hold the line if need be. It’s worth noting that Prussian infantry carry Spanish muskets-  devasting weapons in the game. Brandenburg-Prussian players who focus on Prussian units will be able to field larger numbers of Spanish muskets than most armies at the expense of troop quality. Otherwise, my previous comments on the Swedes and Imperials largely apply here.

Transylvania – Rules found in The Deluge
Image result for by fire and sword transylvania
Transylvania has both excellent and very poor cavalry
Pros
-          Variety! Transylvanian forces have a broad variety of units and unit quality.
-          Can field a large amount of poor quality troops while bolstering with elite formations
-          Faction special rules give flexibility at the start of the battle
Cons
-          A majority of troops are poor quality
-          Minimal artillery
-          Lots of units with Poor Tactical Discipline and Robbers.
-          Low Command
Transylvania is the faction I feel the least confident writing about here. If there are any Transylvanian players reading feel free to comment your thoughts and ideas. The Transylvanian player suffers from a similar problem to the Muscovites – masses of cheap troops and low command values. Transylvanian troops also often suffer from Poor Tactical Discipline and Robbers. Robbers may potentially exacerbate the command problems that the player is already experiencing.

Despite the issues, the faction has upsides! Poor troops typically means low points values meaning you can make up the power gap either with a horde or scenario balancing.  The Transylvanian infantry is often not too bad – while not elite like their western counterparts many of the infantry options lack any glaring bad points and have decent stats. Household Cavalry are a strong, elite cavalry option for the Transylvanian player. Take that Hill! Allows the player to deploy on a hill outside their deployment zone (get those better infantry up there for an advantage) and Ambush will allow the player to help offset some of the armies advantages with flanking manoeuvres. I recommend Transylvania for more experienced players who can manage their troops efficiently and prioritise command points.

Royal City of Gdansk – Rules found in The Deluge
Pros
-          Defensive minded – plenty of infantry and fortifications
-          Marksmen in ambush
-          Good amount of artillery and the unique mortar
Cons
-          Lacking quality cavalry
-          Mercenary infantry regiments are small in size

Gdansk is an interesting army, mostly consisting of poor quality defensive infantry. Their sole type of cavalry regiment – the combined cavalry regiment – combines decent mercenary reiters with poor quality militia cavalry. Gdansk forces typically take a large number of fortifications and indeed are forced to take them at the divisional level. Gdansk forces  can expect a lot of firepower with a good amount of divisional artillery and are one of only two factions to have access to a mortar (the HRE also having access in one division).

Gdansk infantry is a mix of poor quality, skill 3 militia alongside mercenary musketeers. Sadly for Gdansk the mercenary regiments are small and won’t be able to sustain large losses in divisional games. That said due to the smaller regiment sizes Gdansk can make do with two (upgradeable to three) command points per regiment and should have relatively few problems with command. A defensive force that I think would be quite forgiving to play for a newer player despite utilising poor quality units.
Kingdom of Denmark – Rules found in Danish Wars
Image result for by fire and sword kingdom of denmark
A Danish skirmish force with Snapphanar at the front.
Pros
-          A well rounded, western style roster gives flexibility
-          The faction is well fleshed out with a good variety of troop types and army lists
-          Combined regiments of reiters and dragoons provide even more flexibility
-          Snapphanar partisans are unique
-          Some divisions have plenty of access to mercenaries, include veteran reiters

Cons
-          Danish national units suffer from Poor Tactical Discipline
-          Norwegian divisions are focused almost exclusively on infantry
-          The War Council Spoke limits tactics options in division games
-          Divisions may suffer from an inexperienced commander with little command

By now you should have a good idea of how the western factions play. In many respects Denmark-Norway is no different. Having received a book exclusively focused on the Danish Wars (a great little supplement by the way) the Danes have received a large variety of lists to use. Some lists are very focused such as the Norwegian divisions which rely almost entirely on infantry regiments. Others are varied, with a core of Danish units backed up by Polish or Imperial allies.

While Danish national infantry and reiters suffer from Poor Tactical Discipline the are still skill 4 unlike, for example, Gdansk militia. Access to mercenary infantry and reiters is also plentiful providing the Danish player with the option to build a force just as reliable as the Swedes or Imperials. They also get access to the Snapphanar partisans which look to be a lot of fun! The Danes offer a lot of variety and should be fun to field in the hands of new and experienced players alike.

The Duchy of Courland and Semigallia – Rules found in Armies of By Fire and Sword Part 1
Pros
-          Great as a side project
-          Strong reconnaissance
-          Reasonably well led
Cons
-          Not really a full army – just a single skirmish force or allied regiment for the Lithuanians
-          Limited roster
Courland is not really an army in the sense that the other factions are. It offers a single skirmish list that can also be fielded as an allied regiment for a Lithuanian army. Because of this, Courland has a limited roster of reiters, mercernary infantry and what amounts to militia cavalry. When played as a skirmish force Courland has strong reconnaissance advantages with an increase to its own reconnaissance and a random decrease to the enemy’s. Courland is not recommended as a faction for new players but rather a side project for those who want a unique skirmish list or for Lithuanian players looking to add allied variety to their divisions.

And that wraps up the faction overviews! I hope you’ve learnt something and are now on your way to picking your first army for By Fire and Sword! Or your second… or third… Next time we’ll start looking at general tactics for the game, focusing on the core mechanics of the game. Future articles will look more in-depth at skirmish, task force and division level tactics as well as faction specific tactics.

Until next time!

Monday, 10 February 2020

By Fire and Sword – Faction Overview Part 1


Welcome again to my series on By Fire and Sword. Today’s post is going to be an overview of the various factions of the game and broadly their strengths and weaknesses. All armies in this post are featured in the Republic in Flames document which is downloadable from Wargamer.pl’s website. Remember that at the Skirmish Level all lists can be found in the online Army Creator. Keep in mind that I am yet to play every single faction for the game and so this should not be taken as tactical gospel. It’s more intended to give you an idea of how each faction plays to help you decide what you would like to play in the game.

Polish-Lithuanian Commonwealth (PLC)
The famous Winged Hussars.
Pros
-          Lots of cavalry
-          Some of the best cavalry in the game including the winged hussars
-          Flexible with the ability to take light cavalry and pike and shot regiments in the same army
-          The largest roster of any faction with multiple allied options
Cons
-          Multiple potentially crippling special rules at division level representing the financial problems of the state during the period
-          That elite cavalry can be expensive. Hussars are 1fsp per base, when 1fsp often gets 2-3 bases of other cavalry.
-          Western style troops aren’t quite as good as their Swedish/Imperial equivalents
-          Little artillery available compared to some factions (Lithuanians in particular).

The PLC is the star of the show in By Fire and Sword, with the game really being about the troubles of the Commonwealth in the period and the game itself being written by Poles. As a result, the PLC is the most fleshed out faction, with different skirmish forces and division for different times over the period. It also has some of the best unit variety in the game. Light cavalry regiments feature Tatar and Wallachian light cavalry and can be fielded side by side with elite, heavy cavalry regiments and western-style pike and shot infantry regiments. This variety and depth is perhaps the most compelling reason to play the Commonwealth – you’ll never be short of new varieties of troops to paint and you are never going to get bored exploring the various options the army has in the game. The PLC also features the most powerful unit in the game – the infamous Winged Hussars. Pancerni and Pethorcy also feature as some of the best cavalry in the game. Polish cavalry often has the elite cavalry special rule, letting it move freely like light cavalry without the combat penalties light cavalry typically suffers.

Overall the PLC is a faction that suits beginners as well as veterans. Beginners will find the flexibility of elite and light cavalry easy to wrap their heads around and will not have to be concerned by the precision required in wheeling and facing unwieldy blocks of cavalry. Yet due to the elite cavalry rule, they still retain frontal hitting power.

Kingdom of Sweden
Pros
-          Strong, well disciplined infantry formations
-          Plentiful artillery
-          Plentiful reiters are perhaps the most dependable cavalry in the game
-          Another well fleshed out faction with numerous lists
-          Plentiful Command Points
-          Quality units make the Swedes beginner friendly
Cons
-          Not a lot of unit variety
-          Often lacking numbers compared to their opponents

The Swedes were the biggest menace to the PLC during the period, almost completely occupying the country during The Deluge. Sweden lacks unit variety, consisting of reiters, dragoons and pike and shot infantry with only a couple of exceptions. While there is variety within these types (armoured vs unarmoured reiters or mercenary vs national infantry for example), the actual difference in play style is small. Swedish players will find themselves using mass reiters supported by pike and shot regiments and plentiful light artillery. Dragoons fulfil an interesting role being mounted infantry and Swedish dragoons are possibly the best in the game. Swedish commanders usually have plenty of command points, giving the player the ability to execute his plans with relative ease.

Swedish players will find their play style dependent on what way they compose their army. Infantry heavy forces will mostly find themselves on the defensive with their pike and shot regiments using the countermarch to advance steadily will laying down fire. Players who lean more towards reiters will have offensive regiments that lack the flexibility of light cavalry but are utterly dependable in combat. Armoured veteran reiters are dead reliable and perhaps the standard by which all other cavalry should be rated. Don’t let the lack of unit variety mask the array of tactical options available to the Swedish commander.


Crimean Khanate
Pros
-          Flexible! Almost every unit is light cavalry
-          Masters of the feint. Feigned Flight will see Tatar units breaking off from charges to isolate and destroy their enemies
-          A high skill level that makes good tacticians exceptionally dangerous
-          Lack unit variety
Cons
-          Light cavalry suffers in a straight up fight – failure to feint and flank will be punished severely
-          Tatar morale is shaky when faced by gunpowder
-          Difficult to learn due to the high skill requirements
-          Bows struggle against armoured opponents

The Crimean Tatars are one of the more interesting factions in the game. They are the successors of the Golden Horde and are primarily a faction of horse archers. Tatars matched up against Western pike and shot battalions are one of the most intriguing battles to play in the period. Like the Swedes, the Tatars lack unit variety. Unlike the Swedes however, the Tatars almost completely lack infantry. Their sole infantry unit, the Kapikullu, are only available at the Task Force and Division levels and even then only in limited numbers. Tatar players then will find their forces composed primarily of Tatar Warriors and the Kazindji, or Tatar Rabble.

The tactics of the Khanate revolve around their horsemen peppering their opponents with arrows before fading away and flanking. Their light cavalry are best used to entrap and flank enemy units. The Khanate’s Their Sight is Better and More Penetrating… special rule allows them to operate independently of their commanders, meaning Tatar players can use multiple, smaller units without the command issues that would plague other factions.

Tatars struggle in a straight up fight however, and if unable to flank their opponents will find it difficult to best even average cavalry. Their morale is highly susceptible to gunpowder wielding opponents and cracking a wall of infantry is a near impossible task without the application of skill. The Khanate then is not a good faction for beginners but will heavily reward those who invest the time to learn how to play them well.

Ottoman Empire
Pros
Ottoman Sipahi. Allah Allah!
-          Huge variety of both infantry and cavalry
-          Big armies! Ottomans are one of the games two “horde” factions
-          Despite carrying the horde tag, the Ottomans can still field elite units
-          A unique play style, combining light cavalry, masses of infantry and masses of banner wielding Sipahi
Cons
-          That variety can make it difficult to learn the ins and outs of the army
-          Ottoman infantry is typically poor and will need support
-          You’re gonna need a lot of guys…
-          Average command points combined with high numbers can make the army difficult to control

The Ottoman Empire is near the peak of its power during this period and wages war against many of the factions, not just the PLC. The Ottoman is THE army for avid painters and are a swirling mass of colour and banners. Without a doubt, a well painted Ottoman army is the most impressive force on the table. Ottoman units can often fight in either open or closed order providing even more variety to the look of the army.

The Ottomans are the second largest force on the table after Muscovy in the game. Masses of poor but cheap infantry lend the Ottomans an advantage in numbers but can be difficult to coordinate. Ottoman commanders typically only have two or three command points so Ottoman players may find it difficult to give orders to their numerous units during a game.

Ottoman cavalry is a mix. Gonullu and Besli offer light cavalry options while the Sipahi are more suited to a straight up fight. Sipahi suffer from poor tactical discipline, providing a punishing penalty in combat but often carry lances and are available in large numbers to make up for it. The Infamous Janissaries suffer from poor morale but can boost this through the deployment of a mehter, or military band. Overall the Ottomans are a flavour rich, fun faction to play with and against and are an absolute spectacle on the table.

The Cossacks
Pros
-          Large amounts of good quality infantry, supplemented by hordes of rabble
-          The wagon train!
-          High quality skirmishing infantry
-          Infantry often have rifled barrels, giving them extraordinary range.
Cons
-          Extremely lacking in cavalry
-          Difficult to attack with due to low speed
-          Wagon train rules are fairly complicated

The Cossacks are one of the most interesting factions in the game. They are an infantry focused force that fights behind linked wagons laden with guns and even small artillery! The wagon train looks incredible on the table and because of this the Cossack Hetmantate fights completely differently to any other faction. Success on the table will be reliant on effectively using the wagon train and integrating it with infantry. Cossack infantry is the focus of the army. Moloitsy and Register Moloitsy are of good quality through their firearms lack the effectiveness of proper muskets. Cossack Rabble are best described as poor at best, but available in large numbers to help support the Moloitsy.

Where the Cossacks can come unstuck. Their sole cavalry unit are dragoons meaning they fight poorly when mounted. This means the Cossacks are at a disadvantage during both reconnaissance and during the game. The Cossacks lack of cavalry can leave them reacting to a cavalry heavy force and in high risk of being outmanoeuvred. The Cossacks then are a faction best suited for experienced players or those willing to put the effort into learning the game and rules.

Muscovy
Pros
-          Numbers! Muscovy has the most troops in the game
-          Big variety of units and regiments
-          Streltsy and Soldats are highly reliable defensive infantry
Cons
-          Severely lacking command points
-          Units are often poor quality
-          Ineffective artillery for some forces

Muscovy, or the Tsardom of Russia are the eastern giant of the game. This period is a time of expansion for Russia and the Muscovites are in frequent conflict over the Poles for control of modern day Belarus and Ukraine. Muscovy has a huge amount of troops, to the point where if you bring enough soldiers, you get even more for free (ie 0fsp)! Sadly, these troops are often poor quality. Boyar Sons are the core of Muscovy’s cavalry but suffer from poor tactical discipline and armour 3. Border Dragoons are poorly armed and skilled and are low in morale (and despite their name have no horses!). Muscovite players however will find their biggest problem in command and control. Not only do they have masses of units to manage, Muscovite commanders are usually poor with low command points (usually 2, sometimes 3). If you play Muscovy, you WILL face hard decisions between giving orders or rallying your troops.

Despite these difficulties, one of the Muscovite strengths is their huge unit variety. Though the poor quality units occupy the mind, Muscovy also has a number of good quality formations. Muscovite Reiters while not as highly skilled as their Swedish or Imperial counterparts come with armour and arquebuses as standard. Field Dragoons are the only dragoon unit in the game to have the pike and shot formation, allowing the Muscovite player to rush a defensive unit up the table or onto an objective. Soldats and Streltsy have berdishes (optional on the Soldats) and re-rolls to their morale when on defensive orders making them some of the game’s best defensive units.

Muscovy’s command scarcity is their greatest weakness. New players may be better suited to a high command faction however the Muscovites aren’t as difficult to wrap the head around as the Ottomans, Cossacks or Tatars and are overall an interesting faction to play.

Well that wraps up part 1! Part 2 will move onto the factions featured in The Deluge and other supplements. If you’re a current player feel free to comment on what faction you play and any tips you have for new players. Detailed tactics articles will be coming soon! Hope you enjoyed the read.